Learn Knots Loops: Learn how to make knots and loops for children aged 3 to 5 years.
| Short on time? Here’s the essentials ✨ |
|---|
| 🎯 Aim for simple loops before complex knots to secure learning by ages 3–5. |
| 🧠 Loops develop fine motor skills, bilateral coordination, and movement planning. |
| 🧵 Prefer thick, contrasting, and flexible cords to reduce fatigue and promote success. |
| 🎲 Turn each session into a short, ritualized, and joyful educational game and manual workshop. |
| 🔁 Repeat with stable cues (nursery rhymes, stories) to strengthen procedural memory. |
| 🧩 Adapt goal at 5 years: reliable loops for shoelaces, “bunny ears” knot, and tightening control. |
| 📱 Explore 3D tools (360° rotation) with an adult to visualize every turn and fold. |
| ⚠️ Always check safety and stay within uses suitable for kindergarten children. |
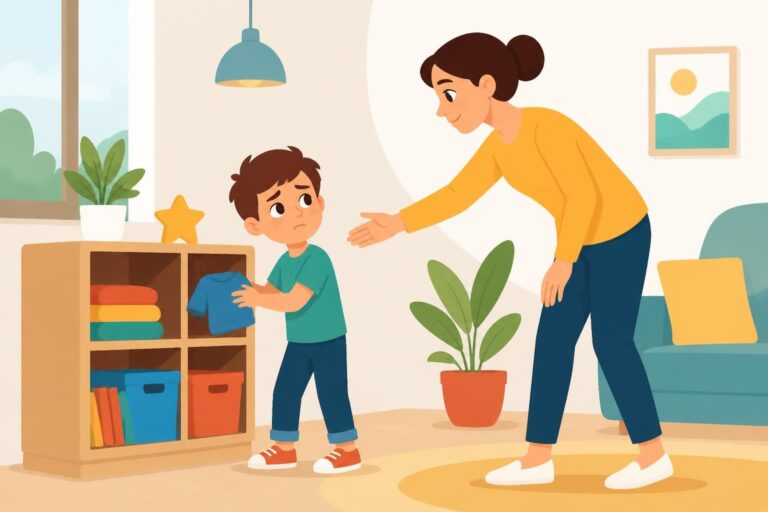
Learning to make knots and loops between 3 and 5 years opens a subtle but essential door to autonomy. In class or at home, these gestures refine fine motor skills, structure coordination of both hands, and lay milestones for writing, dressing, and sports activities. Yet, it’s not left to chance. A gentle, playful, and progressive framework creates quick successes that encourage children, including the most hesitant.
Early childhood professionals observe this daily. When a loop forms fluidly, the child straightens up, smiles, then tries again. This joy activates attention and boosts gesture memory. In 2026, immersive digital resources further strengthen this process. It then becomes easy to orchestrate a short, age-calibrated manual workshop, where each instruction leads to a clear action. All happens safely, with suitable materials and constant vigilance.
Learning knots and loops at 3–5 years: motor basics and active pedagogy
Between 3 and 5 years, the brain orchestrates a symphony of connections dedicated to controlling hands, fingers, and gaze. Loops drive this synchronization. They mobilize the “holding” hand and the “acting” hand, a precious duo for writing and dressing. By targeting short, repetitive, and enjoyable gestures, the adult feeds curiosity and stabilizes progress.
The loop comes before the knot, as it requires less internal wrist rotation and less pinching strength. It’s an ideal entryway. At 5 years, a child often manages to make two “ears” and cross them. They don’t always tighten with the right intensity. Still, the gesture structure is there, which is crucial for what comes next.
What gesture science reveals
Loops stimulate fine motor skills, bilateral coordination, and inhibition of extraneous gestures. The eyes follow the cord, the hand adjusts the tension, and the body manages balance. These micro-victories add up. They facilitate the “loops” graphics practiced in kindergarten and establish a motor tempo that will serve for shoelaces.
Procedural memory is built through trials, corrections, and visible successes. Color markings on the cord reinforce this memory. The child orients, anticipates, then generalizes the gesture to other contexts.
Guiding story: Lina and Noé
Lina, 4 years old, observes a lot but acts little. A very short, playful, and repetitive workshop helps her. A thick cord is placed between her fingers. The instruction is fixed on a simple picture. After three sessions, she makes a first loop. This small success triggers the desire to try a “cross-drop” for a light knot.
Noé, at 5 years, is lively but hurried. He pulls too hard and undoes everything. A rhythmic cue accompanies him: “Cross, place, tighten gently.” The tone of the rhyme slows the gesture. In two weeks, his shoelaces hold longer, and he gains calmness in the changing room.
Why aim for progressive autonomy
The knot isn’t a gadget. It structures sequential thinking, develops patience, and strengthens self-confidence. When a child tied their own shoes alone, they enter activities more calmly. The group progresses better and the adult can focus attention elsewhere. It’s an organizational as well as motor lever.
Once these foundations are installed, the path opens. Simple techniques adapted to the curiosity of this age can then be explored, without skipping steps or imposing heaviness.
Concrete techniques to teach loops and knots in kindergarten
The key lies in clear progression. First, tolerant materials are chosen, then a short routine is established. Gestures become readable, and the child stays the process actor. A joyful atmosphere, some sequential pictures, and a calm space make a big difference.
The right material for success from the first session
- 🧶 Thick and flexible cord, two-colored if possible, for immediate visual detection.
- 🎀 Wide fabric ribbons to reduce friction and spare little fingers.
- 🧩 Training board with large eyelets, to stabilize the cord and support coordination.
- 🎯 Color markers at “pinching zones” to guide fine motor skills.
- 🪄 Magnetic figurines or stickers to symbolize “pass in front,” “pass behind.”
With this setup, the hand trembles less and the loop forms quickly. The child sees, understands, and dares to try again. It’s the best guarantee of lasting learning.
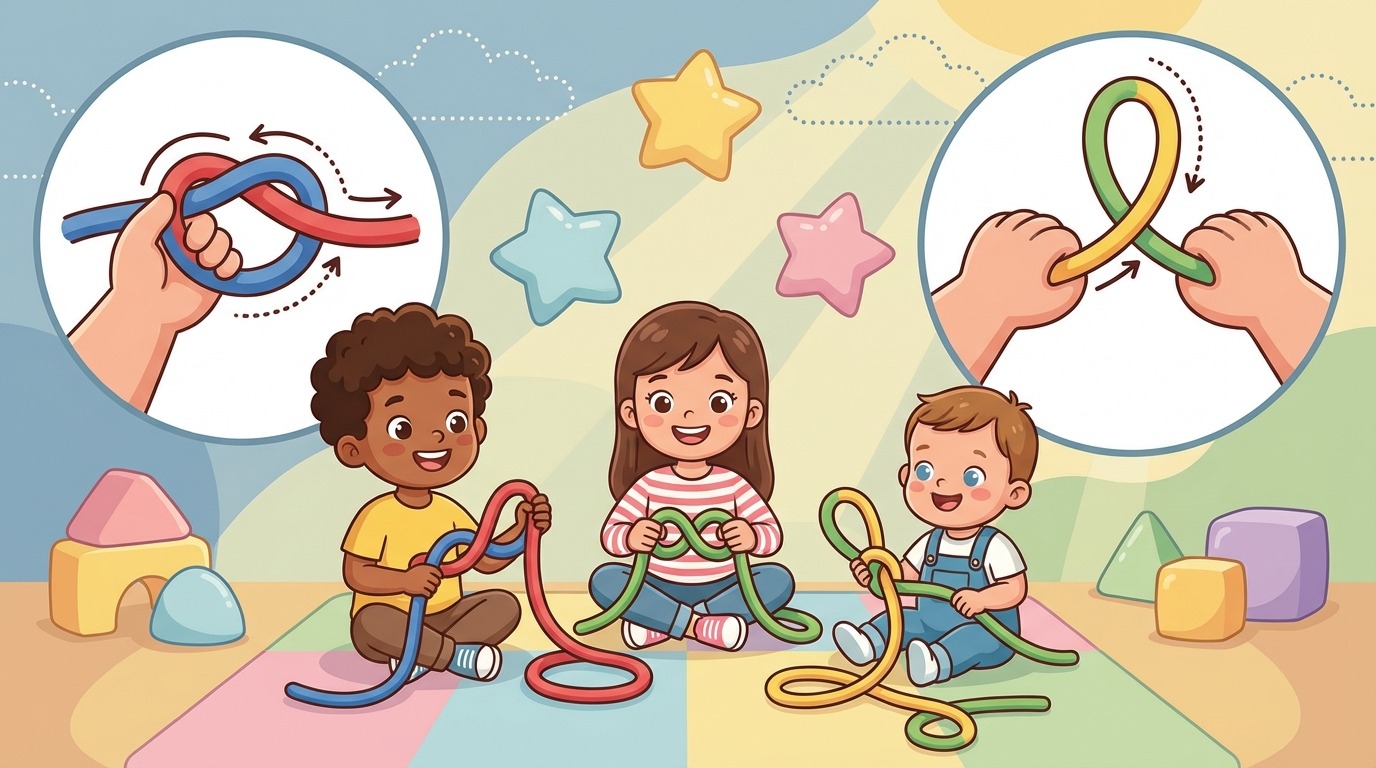
Three-step progression
Step 1: form a simple loop and hold it open. Count “one, two” to stabilize. The “holding” hand becomes reliable, freeing the “acting” hand. Step 2: create two “ears” and cross them. Then place the crossing so as not to undo everything. Step 3: pass one ear through the “small tunnel” and tighten gently by pinching near the knot. Children love to switch from one to the other with a story.
The rhyme structures the effort. A short phrase per action calms the momentum and sets a tempo. This avoids abrupt gestures that close the loop too early.
Common mistakes and gentle corrections
Two mistakes often recur. The first: pulling on the ends rather than on the ears. The adult rephrases and shows a pinch close to the knot. The second: placing the crossing too far from the pinch. Fingers are brought closer to the center. A discreet marking on the cord recalls the correct zone.
To visualize gestures concretely, a child-friendly video helps the adult calibrate explanations.
After watching, return to real material. Three successful tries in a row embed the skill. Praise the targeted effort: “You pinched in the right spot.” This emphasis on strategy, not just outcome, nourishes confidence.
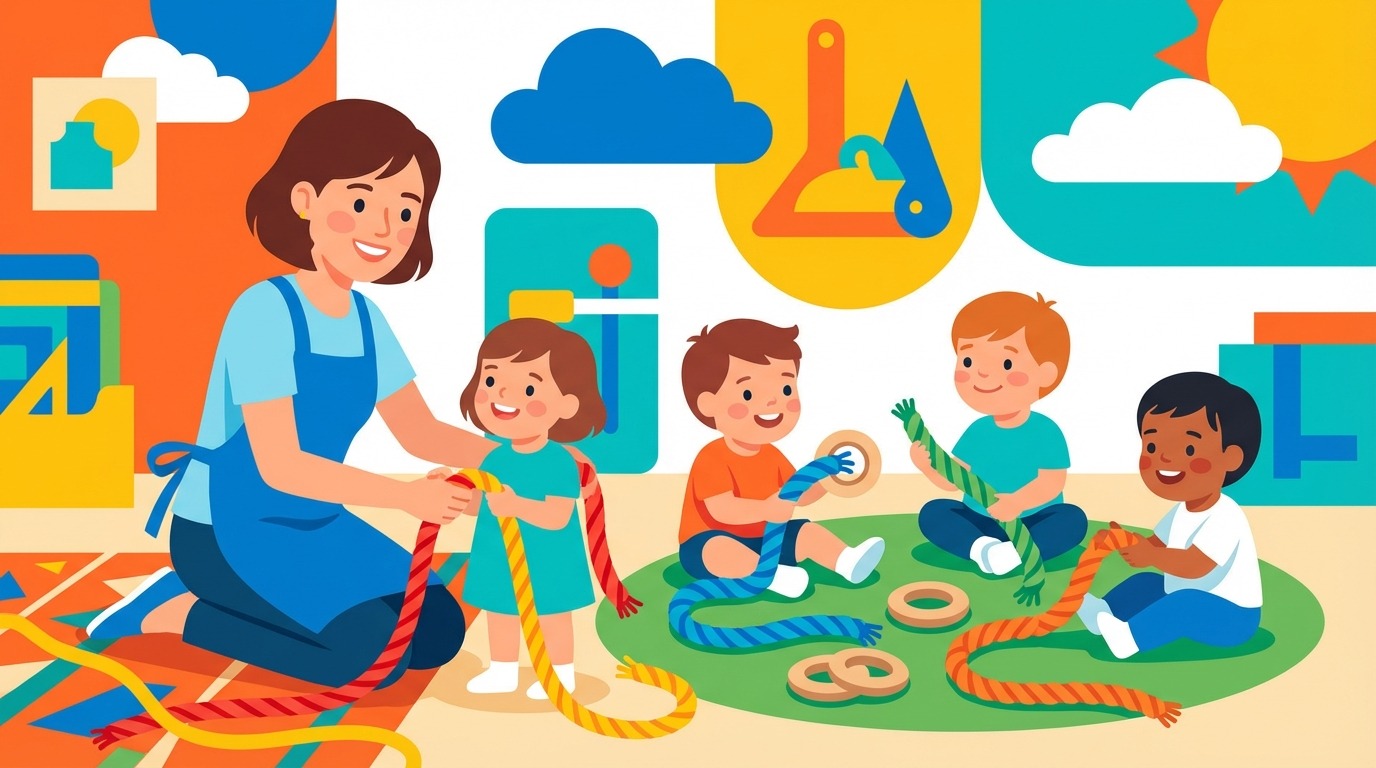
Manual workshops and educational games: effective scenarios for class and home
A manual workshop should remain short, lively, and predictable. Five to ten minutes suffice for children aged 3 to 5. Begin with a story, demonstrate in three gestures, then each child practices at a clear station. The objective is unique and concrete: “make and hold a loop” or “cross two ears.”
“Loop market” scenario
Booths offer varied textures: cord, ribbon, shoelace, soft string. Children “buy” a mission with an emoji token. They return to show their loop to the “booth leader.” This ritualized movement maintains motivation. It also sets social cues: waiting your turn, explaining what you did.
Each success validates a “level” that unlocks a challenge. For example, creating a large loop around a foam object without knocking it over. Children then learn to dose tension. The child measures the effect of their gesture on the object.
“Rope course” scenario
A guiding thread crosses three stations: form a loop, cross two ears, tighten gently. The group progresses to the rhythm of calm music. The clarity of stations reduces mental load. No long explanations are needed. The decor speaks.
To enrich the experience, simple pictograms can be displayed at each step. Non-reading children also orient themselves there. This visual support stabilizes attention in action.
Consolidation rituals at home
Families can play after bath time, when hands are warm. Two minutes suffice. Keep the same cord and the same rhyme as at school. This continuity speeds up the development of procedural memory and strengthens confidence. The child feels competent in two places.
To show a variant or review a precise gesture, a targeted video facilitates alignment between adults.
Conclude each mini-ritual with a real-life situation. For example, closing a toy bag or tying a decorative ribbon. The child understands the immediate usefulness of the gesture, anchoring motivation.
Digital tools and 3D resources for immersive learning
3D animations transform a movement into a comprehensible sequence. A platform dedicated to knots offers over 200 animated tutorials, each rotatable 360°. You watch a bowline knot form, rotate the view, slow down, and notice how each turn builds the structure. This clarity surpasses that of still images.
When and how to use 3D with children
An adult guides the session. Simple content is chosen: loops, basic shoelace knot, visual principles “front / behind.” The video serves as a discussion starter. Then return to physical material. This screen-object alternation avoids passivity and consolidates action.
360° rotation reveals hidden zones. The child understands where the cord passes. With contrasting colors, visual tracking becomes natural. Errors correct faster as the model remains available from all angles.
Practical resources to explore
Knot libraries list essentials for sailing, hiking, or camping. Of course, only gestures adapted to the age are selected. For practicing “regular loop” graphics, online training sheets exist. They cleverly extend manipulations without replacing them.
A warning remains necessary. Poorly executed tying techniques can be dangerous. It is essential to check with a competent adult and stay within playful uses, without load constraints. This protective framework keeps exploration joyful and safe.
A springboard toward autonomy
Using these tools means gaining precision. Adults leading workshops save explanation time. Children gain tactile-visual understanding. The tandem is powerful. It transforms a vague instruction into a clear and tangible adventure.
Digital doesn’t replace the hand. It makes it more confident, better prepared, and curious to try again. This is the spirit of a well-thought-out educational game.
Assessing progress and supporting coordination in 5-year-olds
Observing is already helping. A simple grid helps see what advances and what blocks. Watch finger placement, loop stability, tension management, and breathing. Support with short words, slow gestures, and regular pauses. The child hears, sees, then tries.
Concrete progress indicators
Three indicators form a winning trio. First, regularity: the child succeeds in making the same loop three times in a row. Next, quality: the crossing stays close to fingers, no slipping. Finally, autonomy: they explain what they’re doing with their own words. This verbalization anchors the sequence and lightens motor effort.
Small difficulties are normal. A very “hurried” dominant hand? Slow down with a rhyme. Pinching too far away? Color the “pinching zone.” Excessive tension? Suggest “breathing the cord” before tightening. These mental images soothe the gesture.
Adapt for all profiles
For a child sensitive to noise, reduce stimuli. Dedicate a quiet corner, whisper instructions, and slightly lengthen duration. For finger fatigue, switch to a wide ribbon, then return to the cord. Steps remain flexible. Success matters more than speed.
At 5 years, aiming for a stable “bunny ears” knot suffices. The goal isn’t complexity. It’s mastering a gesture that will serve each morning for putting on shoes and each week for crafts. This daily utility maintains the desire to learn.
Anchoring rituals and continuity
A five-minute ritual after nap consolidates memory. Use the same cord, the same story, the same music. Children establish their cues within days. The class gains fluidity over all transition times.
Over weeks, the adult lessens help. They show less, ask more: “Where do your fingers go now?” This shift installs autonomy. Children feel capable and start new motor challenges.
“A learned gesture is a growing confidence — loop after loop, autonomy weaves itself.”
{“@context”:”https://schema.org”,”@type”:”FAQPage”,”mainEntity”:[{“@type”:”Question”,”name”:”How long per session for this learning?”,”acceptedAnswer”:{“@type”:”Answer”,”text”:”Sessions of 5 to 10 minutes are enough. Short, rhythmic, and joyful, they avoid fatigue and promote effective repetition.”}},{“@type”:”Question”,”name”:”Which material to choose to start?”,”acceptedAnswer”:{“@type”:”Answer”,”text”:”A thick, flexible, and contrasting cord. Wide ribbons are perfect at the start because they slide less and spare fingers.”}},{“@type”:”Question”,”name”:”Should we start with knots or loops?”,”acceptedAnswer”:{“@type”:”Answer”,”text”:”Always with loops. They require fewer wrist rotations. The “bunny ears” knot naturally comes next.”}},{“@type”:”Question”,”name”:”How to motivate a discouraged child?”,”acceptedAnswer”:{“@type”:”Answer”,”text”:”Tell a little story, use a rhyme, and praise the precise effort (pinching, placement) rather than the final result.”}},{“@type”:”Question”,”name”:”Which safety risks to avoid?”,”acceptedAnswer”:{“@type”:”Answer”,”text”:”Avoid any use under tension, supervise continuously and avoid cords around the neck. Verify each technique with a competent adult.”}}]}How long per session for this learning?
Sessions of 5 to 10 minutes are enough. Short, rhythmic, and joyful, they avoid fatigue and promote effective repetition.
Which material to choose to start?
A thick, flexible, and contrasting cord. Wide ribbons are perfect at the start because they slide less and spare fingers.
Should we start with knots or loops?
Always with loops. They require fewer wrist rotations. The “bunny ears” knot naturally comes next.
How to motivate a discouraged child?
Tell a little story, use a rhyme, and praise the precise effort (pinching, placement) rather than the final result.
Which safety risks to avoid?
Avoid any use under tension, supervise continuously and avoid cords around the neck. Verify each technique with a competent adult.