Pizza Pita : Recipe: pita pizza, easy and quick for the family.
| Short on time? Here’s the essentials ⚡ |
|---|
| ⏱️ Ready in 15 minutes (5 min preparation, 10 min cooking) |
| 🫓 Base: pita dough whole wheat or white |
| 🔥 Oven at 205°C (or 190°C with fan), middle rack |
| 🍅 Toppings: tomato, cheese (optional), vegetables, olives |
| 🥄 Crispiness tip: pre-toast the pita 2-3 min before filling |
| 🍳 Alternative cooking: covered pan or Air Fryer |
| 🥗 Ideal for a friendly meal of family cooking |
| 🥦 Fresh ingredients and infinitely customizable |
| ✅ Calories: ~280-400 kcal per pita pizza depending on the version |
Between busy days and sudden cravings to delight everyone, the pita pizza has conquered family kitchens. This easy recipe transforms a simple pita dough into a crispy and golden base, ready to welcome fresh ingredients, fragrant tomato, herbs, and sometimes a veil of cheese. It checks all the boxes for a quick dish that sacrifices neither indulgence nor balance. Above all, it breaks the myth of complicated pizza: no kneading, no waiting, zero stress. In fifteen minutes flat, the table is adorned with colorful mini pizzas, highly customizable, perfect for a friendly meal where everyone creates their winning combination. At a time when the Air Fryer and quick cooking methods are taking hold at home, this method fits perfectly with today’s rhythms without giving up the pleasure of cooking together.
Practically speaking, the simple preparation fits into the routine: spread the sauce, distribute the vegetables, cook for ten minutes, and enjoy. Yet, simplicity does not prevent creativity. Three approaches guide the process: optimize crispiness, balance textures and flavors, and adapt according to nutritional needs. Why miss out when the same base accepts classic tomato sauce, the creaminess of hummus, or the smoky touch of roasted peppers? The result is a playful format that encourages kids to taste vegetables and reassures parents: the colors whet the appetite, portions are easy to control, and the oven does most of the work. The pita pizza then becomes the wildcard for busy evenings but also the star of a relaxed buffet.
Homemade pita pizza: the easy recipe that saves weeknights
Faced with the eternal question of dinner, the pita pizza proves strategically unbeatable. It offers an easy recipe and a quick dish assembled in a few steps. The secret? The pita dough serves as a ready-made base, thin enough to be crispy, sturdy enough to support generous toppings. A hot oven, a baking sheet, and it’s done. In many kitchens, this solution replaces late deliveries. The gain is twofold: time and control over ingredients.
Beyond speed, the health argument weighs in. Choosing a whole wheat pita increases fiber and promotes satiety. The base welcomes a low-sugar tomato sauce, then various fresh ingredients. Vegetables provide color, crunch, vitamins. Families find common ground: keeping the pizza spirit but lightening it without frustration. Children quickly grasp the playful challenge of creating “their” pizza.
Why pita dough makes all the difference
The pita dough balances thin crust and softness. It becomes crispy around the edges in ten minutes. Unlike softer flatbreads, it limits sogginess risks if the sauce is properly dosed. Greek pitas, thicker, offer a tender center pleasing to lovers of soft crust. Conversely, a thin pita suits fans of light “romana” style pizzas. So choose according to the desired texture, like choosing a thin or thick dough in a pizzeria.
To enhance crispiness, a simple trick works: pre-toast the pita for two to three minutes during preheating. This pre-cooking removes some moisture. The sauce sticks better, edges caramelize more easily. Result: a clean, crunchy base that supports juicy vegetables without softening.
Timing and express organization
The method convinces by its logic: preheat the oven to 205°C (or 190°C with fan), line the baking sheet with parchment paper, then fill. The key gesture is spreading the sauce in a thin, even layer, leaving a one-centimeter border. This bare ring becomes a pleasant golden crust. Then carefully distribute the toppings so each bite remains balanced. Finally, ten minutes of cooking suffice to brown the edge and heat the top.
In 2026, households juggle schedules. This technique reduces mental friction: no dough to manage, no long lists. A refrigerator well-stocked with fresh ingredients is enough. The rest rests on the oven. And if you prefer the pan or Air Fryer, the flexibility remains intact. Ultimately, what saves the week is not just speed; it is the reproducible simplicity without thinking.
In short, adopting pita pizza means gaining useful time while maintaining control over taste and balance: a clear win for family cooking.
Detailed steps for a crispy and tender result
Preheat the oven to 205°C. The baking sheet is lined with parchment paper to limit sticking and ease cleaning. The pita lies flat, ready to be topped. Spread the sauce with the back of a spoon, up to one centimeter from the edge. This border dries faster and becomes crust.
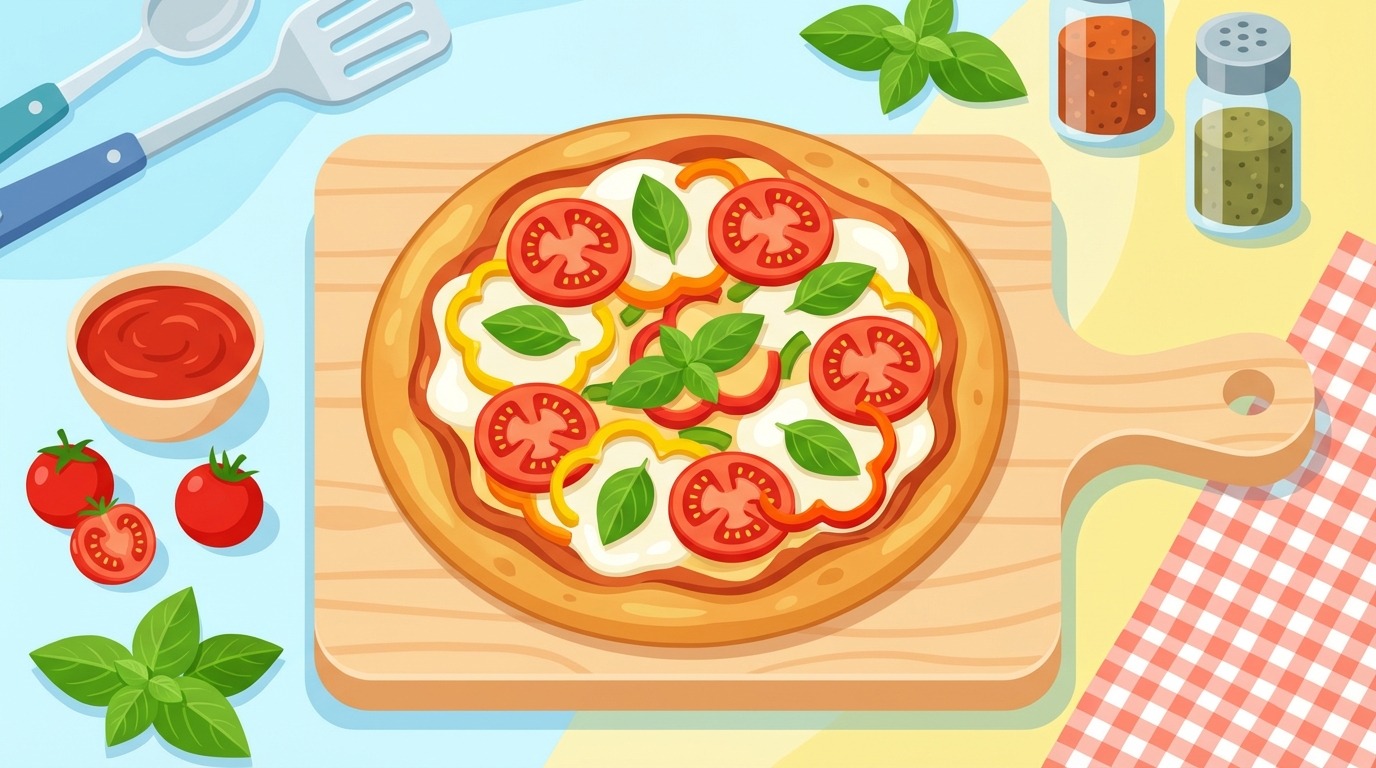
Add the toppings in thin layers, balancing colors and textures. Spinach goes directly on the hummus for the dedicated version. Avocado waits for the oven exit. A touch of dried herbs (oregano, thyme) structures the aroma. If you want cheese, a light sprinkling is enough. Too much cheese would weigh down the pita and mask the vegetables.
The baking sheet goes to the middle rack. Ten minutes later, edges are golden, fresh ingredients nicely heated. Let rest two minutes so juices stabilize. Cutting into triangular slices facilitates serving and tasting. A drizzle of raw olive oil, some chopped basil, and it’s ready.
Alternative cooking methods tested and approved
In a pan, the method remains direct. A large non-stick pan heats over medium heat. Place the topped pita and cover. The lid retains heat. In 5 to 7 minutes, the bottom becomes crispy while the top heats. Lift briefly to avoid excessive browning.
In the Air Fryer, the result impresses. Preheat to 180°C. The pita pizza cooks 4 to 6 minutes in the basket. The hot air flow quickly browns the top and firms the base. It’s the best option to revive a fridge pita pizza: it regains its texture without drying out.
To push the crispiness, you can toast the plain pita 2 to 3 minutes in the oven or dry in a hot pan. Then top and finish cooking. This two-step eliminates excess moisture and creates a very crunchy “biscuit effect.” It especially suits thick Greek-style pitas.
Ultimately, the chosen technique depends on equipment and time. The key lies in observation: golden edges, hot topping, and solid hand-hold. It’s the signature of a mastered pita pizza.
Fresh ingredients and variations: tomato, cheese, hummus, spinach
The strength of an easy recipe often comes from a simple base and interchangeable modules. With pita pizza, the structure remains identical while flavors travel. The tomato sauce guarantees a timeless classic. Hummus opens the door to plant proteins and a creamy texture. Spinach, olives, and pineapple create interesting contrasts. Cheese remains optional but rounds the aromas and appeals to children.
For the common base, plan a whole wheat (or white) pita, a sauce (marinara or hummus), then an assortment of finely diced vegetables. Fresh ingredients benefit from being cut finely. The oven will keep them warm; no need to overload. Aim more for variety than quantity. This dosing avoids excess water and preserves the crust’s integrity.
Three winning toppings that everyone loves
Classic vegetarian version: generous tomato sauce, chopped fresh tomatoes, black olives, peppers, mushrooms, and a touch of pineapple for sweet and sour contrast. This choice delights with its palette. Olives offer deep saltiness, peppers a lively crunch, and mushrooms an earthy note. Pineapple surprises but brightens the whole. A little grated cheese optionally melts on top and brings the profile closer to a “fully loaded” pizza.
Hummus and fresh vegetables version: a base of plain hummus, slices of pepper, mushrooms, olives, diced red onion. When out of the oven, add raw diced avocado. This cold finish provides creaminess and freshness. Cooked avocado would lose delicacy; it deserves to be last. This variant fills well thanks to the fiber and plant proteins from chickpeas.
Hummus with roasted peppers and spinach: hummus flavored with roasted peppers, a handful of spinach on the base, mushrooms and olives. Baby leaves “fall” gently under the heat effect. The whole sings Mediterranean, with a very pleasant smoky depth. Here, some feta crumbs after cooking add a milky and salty touch. For a plant-based option, swap feta for a cashew-based “fauxmage.”
The smart pantry for improvisation
- 🫙 Quality tomato sauce or coulis without added sugar: clean and controlled flavor.
- 🥫 Jarred hummus: ready-to-use creamy base, plain or with roasted peppers.
- 🫒 Sliced black olives: salty and fruity touch, always effective.
- 🍄 Sliced mushrooms: tender texture, earthy taste that balances.
- 🌶️ Multicolored peppers: crunch, vitamin C, and visual pep.
- 🥑 Avocado: creaminess raw to finish the pizza, to add after cooking.
- 🧀 Cheeses of choice: mozzarella, feta, or melting vegan alternative.
With these elements, you follow the mood of the day. Modulate salt, sweetness, acidity, heat. In the end, the same base, multiple flavor profiles: it’s the DNA of a genuine adaptable family cooking.
Simple preparation and cooking: oven, pan and Air Fryer without hassle
The promise of the pita pizza rests on three verbs: spread, top, cook. Yet every step counts. Good preheating, smart ingredient distribution, then brief but precise cooking ensure success. The simple preparation excludes neither rigor nor taste demands. On the contrary, it makes them accessible to all.
Detailed steps for a crispy-soft result
Preheat the oven to 205°C. The tray is lined with parchment paper to limit sticking and ease cleaning. The pita is laid flat, ready to be spread. Spread the sauce with the back of a spoon, leaving a one-centimeter border. This edge dries faster and becomes crust.
Add the toppings in thin layers, balancing colors and textures. Spinach goes directly on the hummus for the dedicated version. Avocado waits for the oven exit. A touch of dried herbs (oregano, thyme) structures the fragrance. If you want cheese, a light sprinkle suffices. Too much cheese would weigh down the pita and mask the vegetables.
The tray goes on the middle rack. Ten minutes later, edges are golden, fresh ingredients nicely warmed. Let rest two minutes so juices stabilize. Cutting into triangular slices facilitates serving and tasting. A drizzle of raw olive oil, some chopped basil, and it’s ready.
Alternative cooking methods tested and approved
In a pan, the method remains straightforward. A large non-stick pan heats over medium heat. Place the topped pita and cover. The lid keeps the heat. In 5 to 7 minutes, the bottom crisps while the top heats. Lift briefly to avoid excessive browning.
In the Air Fryer, results impress. Preheat to 180°C. The pita pizza cooks 4 to 6 minutes in the basket. Hot air browns the top quickly and firms the base. It’s the best option to revive a fridge pita pizza: it restores firmness without drying.
To increase crispiness, you can toast plain pita 2 to 3 minutes in the oven or dry in a hot pan. Then top and finish cooking. This double step removes excess moisture and creates a very crunchy “toast effect.” It is especially suited to thick Greek-style pitas.
Ultimately, the chosen technique depends on equipment and time. The important thing is observation: golden edges, hot topping, and firm hold. This is the signature of a mastered pita pizza.
Nutrition, allergies and balance: a pita pizza for everyone
A pizza can be light without losing its soul. The pita pizza proves it. Depending on toppings, a portion ranges around 280 to 400 kcal. The classic tomato and vegetable version sits at the low end. With hummus and avocado, calories increase slightly, but you gain plant proteins and good fats. The goal is not obsessive counting but aligning pleasure and satiety.
In micronutrients, diversity always wins. Peppers for vitamin C, spinach for K and non-heme iron, tomatoes for lycopene. Olives bring polyphenols and an unmistakable Mediterranean aroma. Whole wheat pita boosts fiber intake and eases digestion, especially during a friendly meal in the evening.
Families with dietary restrictions can adapt with ease. In cases of lactose sensitivity, choose lactose-free cheese or switch to melting plant-based options. For better understanding and stress-free choices, a clear guide on how to manage lactose intolerance in children provides useful benchmarks. Tomato sauces without cream and homemade hummus also reassure about the composition.
Educationally, this family cooking offers a pedagogical terrain. Children learn to compose a balanced plate: cereal base, varied vegetables, protein source (chickpeas, smoked tofu, tuna, or shredded chicken). They gain autonomy and culinary curiosity. Pita pizza becomes an entry point to sometimes shunned vegetables, as they handle, taste, then affirm with pride.
Avoiding dryness remains simple. Use sauce with reasoned generosity. Favor juicy vegetables (tomatoes, peppers). Watch cooking to stop at “just golden.” A drizzle of raw olive oil or a spoonful of herb Greek yogurt often finishes the equation. This attention prevents adding too much cheese to “count” on it alone.
For afternoon snacks before dinner, better choose light bites. Find inspiring ideas with these ideas for healthier snacks. Thus, appetites stay lively by pita pizza time, and portions remain reasonable. Balance often hinges on small details: good rhythm, proper hydration, and a dinner that brings together a circle of colorful pitas.
Conclusion? Simple cooking does not mean simplistic cooking. Well thought-out, pita pizza embraces constraints and pleasures without sacrificing balance.
Service, batch cooking and ideas for a friendly gathering meal
Once out of the oven, the pita pizza suits all formats. As an individual dish, it goes with a green salad with lemon. For sharing platters, it’s cut into slices and circulated around the table. Mini-pizza format democratizes tasting: no one waits, everyone samples. Keep the friendly meal spirit: relaxed, colorful, paced by exchanges.
For buffet mode, three to five variants suffice for visual and taste contrast. Think of a trio: classic tomato, hummus-avocado, hummus-peppers-spinach. Each profile answers a desire. Place small side bowls: chili flakes, oregano, capers, olive oil, balsamic, fresh herbs. These final touches allow last-second adjustment, depending on mood.
Family cooking workshop to boost appetite
The “pizza bar” turns dinner into an activity. Pitas wait, sauces are ready, vegetables chopped. Hands take turns. Children are encouraged to mix: one red part (tomato, pepper), one green part (spinach, herbs), one protein source. This ritual strengthens meal engagement. The spirit of positive competition pushes to try new combinations. Who will invent the best combo of the day?
For planners, batch cooking simplifies even more. Pre-wash and dice vegetables the day before. Store separately. When evening comes, assembly takes two minutes per pizza. Cooking remains the same. For reheating, the Air Fryer restores a texture close to fresh. In the oven, a few minutes at 180°C suffice. Avoid microwaves, which soften the base.
Proteins strengthen satiety. Add some smoked tofu cubes, roasted chickpeas, drained tuna, or leftover shredded grilled chicken. These additions stay sober, so as not to overload the pita dough. They offer a robust dinner, ideal before children’s sports evening or a tight schedule.
To enrich tasting, dipping sauces work wonderfully. Garlic Greek yogurt, pesto, tapenade, or an additional hummus. Dipping the crust in a cold sauce adds a fun thermal contrast. You get double pleasure: hot crunch, cool creaminess.
In brief, the service adapts to context. Family dinner, cocktail aperitif, afternoon with friends: the simple preparation and flexibility of pita pizza make everything easier. Conviviality builds in mastered variety and smooth service rhythm.
Common problem solutions and pro tips for a foolproof pita pizza
Small mistakes often come back but fix quickly. If the base gets soggy, it’s often overloaded with sauce or moisture poorly distributed. The remedy? Spread thinner, add a juicy ingredient but in smaller dices, and pre-toast the pita. If the pizza seems dry, add a bit more sauce, shorten cooking, and finish with a drizzle of raw olive oil.
The cheese dosage sparks debates. Too much and the dough becomes heavy. Too little and children sulk. The winning strategy is to “sprinkle” not “cover.” Grated mozzarella browns nicely in small amounts. Feta, after cooking, provides a sharp saltiness. Today’s melting plant-based alternatives work well: offer stringy visuals without dominating.
Another point: mastering alternative cooking. In a pan, beware of excessive direct heat. The bottom can brown before the top heats. The lid fixes this by rebalancing heat from above. In Air Fryer, watch the distance between the heating element and pizza. If the topping colors too fast, lower temperature slightly or reduce basket height.
On hygiene and organization, a few gestures matter. Separate boards and knives to avoid contamination if meats or fish are involved. Salt sparingly, as olives and cheeses already add salt. Mix textures: crunchy (peppers), juicy (tomatoes), soft (avocado), and aromatic (herbs). This quartet often solves 90% of mouthfeel perception problems.
Finally, before large gatherings, prepare labeled topping trays. Service speeds up, creativity flows. Anticipate taste variety: an “olive-free” option, one without chili, a 100% plant-based. Keep the same pita dough base and same cooking. This standardization simplifies everything without sacrificing plate originality.
Ultimately, a successful pita pizza relies on modest anticipation and joyful precision in little gestures. It’s the experience that settles in and reassures.
Can pita pizzas be prepared in advance without getting soggy?
Yes, prepare all toppings and sauces in advance, but assemble at the last moment. The pita absorbs moisture if it waits too long. Two minutes of assembly are enough before baking.
How to prevent them from being dry?
Spread a generous but thin layer of sauce, favor juicy vegetables (tomatoes, peppers), cook just enough, then finish with a drizzle of olive oil or an herbed yogurt.
Which type of pita to choose for the best texture?
For crispiness, choose a thin pita. For softness, a thicker Greek pita. Whole wheat brings more fiber and a rustic flavor; white pita offers a more neutral taste.
Is pita pizza suitable for vegan diets?
Yes. Vegan pita base, tomato sauce or hummus, vegetables at will, and vegan cheese if desired. Check the label of the pita and sauce to exclude dairy or honey.
Can it be cooked without an oven?
Absolutely. In a pan over medium heat with lid for 5–7 minutes. In an Air Fryer at 180°C, 4–6 minutes. The result is crispy and quick in both cases.
“One pita, three moves, a thousand smiles: the simplest pizza is often the most unforgettable.” 🍕✨