Remove Training Wheels: Chronicle: when the time comes to remove the training wheels.
| Short on time? Here’s the essentials ⏱️ |
|---|
| Wait for signs of cyclist confidence and child balance before removing training wheels 🚦 |
| Favor a bike transition using a balance bike or by removing the pedals 🛠️ |
| Choose flat terrain, a well-fitted helmet, and mark out the practice area 🦺 |
| Break down the bike learning into micro-steps for visible bike progress 📈 |
| Replace the training pads with momentum, braking, and turning games 🎯 |
| Practice short, regular, and very positive sessions 😊 |
| Reassuring rituals, encouraging language, and small victories celebrated 🌟 |
| Remind about child bike safety after each progress, without dramatizing 🛑 |
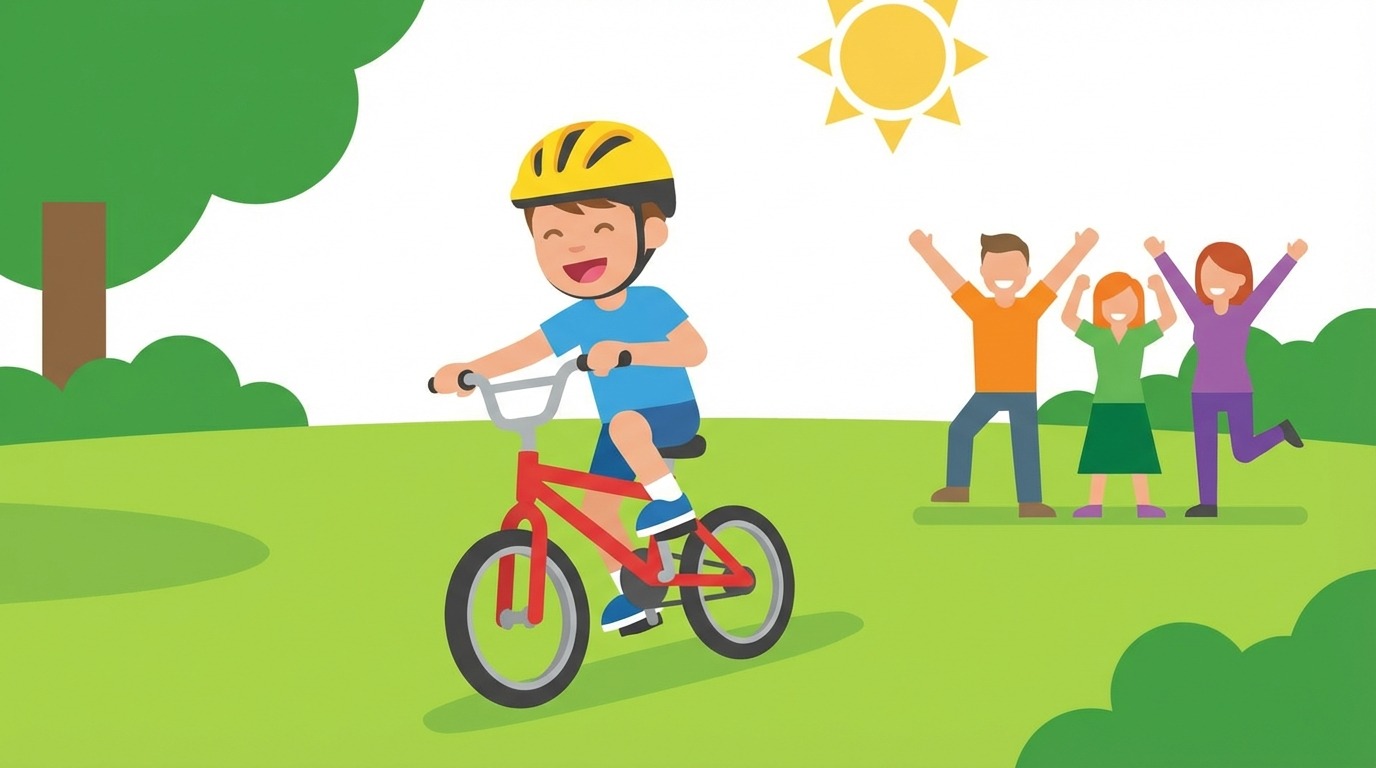
When the bike stops being a reassuring tripod and becomes a balancing adventure, the child’s heart races just as much as the adult’s beside them. In many families, the moment to remove training wheels marks a symbolic milestone. It reveals new autonomy, but also a fine orchestration between gestures, emotions, and safe frameworks. To succeed in this bike transition, a guiding principle applies: listen to the body, support the mind, and structure the play.
There are many reference points, yet each story is unique. Bike learning flows better when preparation respects the developmental rhythm, balances the child’s balance, and ritualizes small motivating steps. On one side, technique; on the other, confidence. Between the two, brief routines, clear instructions, and a well-thought-out environment. This story highlights tested strategies, smart games, and bike learning tips that transform fear into momentum.
Spotting the right moment to remove the training wheels: child balance, signals, and maturity
The right timing starts with observation. A ready child shows a steady pedaling, a gaze directed far ahead, and relaxed shoulders. Their body “speaks”: seeking momentum, stopping carefully, then restarting. These are strong signs of child balance and cyclist confidence. Conversely, constant tension or repeated refusals suggest waiting a bit longer.
Should age be linked to the decision to remove training wheels? Better to use a range of signs. Between three and five years old, this window often opens. The connection between gross motor skills, postural tone, and impulse control plays a decisive role. Useful insight is found in this article on development at 3-4 years. It reminds how coordination and joint attention support the desire to try.
Motivation is a test. When the child asks to go faster, to “do like the big kids,” or to try the gentle slope in the park, the bike transition becomes natural. This curiosity guides the pace. It also shows in the ability to listen to a short instruction and immediately apply it.
From a motor viewpoint, three signs stand out. First, controlled momentum: the child pushes, glides straight, then corrects their trajectory. Next, clean braking: hands rest properly on the levers, pressure stays gradual. Finally, regaining balance: a slight wobble is quickly corrected without panic.
On the emotional side, the ready child accepts uncertainty for a few seconds. They laugh after a small fright, then ask to try again. This flexibility signals a secure, calm base. The adult’s role is not to erase risk, but to frame it, so the trial keeps the flavor of controlled play.
An example illustrates these points: Léa, four years old, enjoys pushing hard on her balance bike. She looks far, balances her torso, and slows before curbs. At the sight of a bike without training pads, her eyes sparkle. The pedals are then removed from the small purple bike. She regains her sliding foothold, then agrees to add the pedal complexity a few days later.
A shared observation time reassures everyone. Two sessions are taken to gauge posture, attention, and braking quality. Then a decision is made, without haste. This decision is best presented as a joyful challenge, not an exam.
In brief, the right moment is neither a fixed age nor an adult caprice. It is the convergence of motor and emotional signs. The “yes” is written when the child shows curiosity, steady sliding, and available listening.

Preparing the bike transition: method without training pads and secure terrain
Before removing training wheels, preparation matters as much as the session. The gentlest method consists of removing pedals and lowering the saddle. The bike then turns into a balance bike. The body regains natural balance without overloading attention. This approach values bike learning through short steps.
Choosing the location impacts success. A smooth alley, slightly downhill, offers easy momentum. Avoid gravel and visual obstacles. Marking with two cones or colored leaves creates a clear “track.” The gaze rests far away, the trajectory follows.
Equipment is prepared uncompromisingly. A well-fitted helmet, closed shoes, and if needed, light gloves. To refine helmet choice and consider the seat for shared trips, this practical guide can help: helmet and seat for baby on bike. A routine adjustment at session start reassures the child and sets a clear framework.
Next, ritualize three blocks: playful warm-up, targeted exercises, and “well done” moment. The first block restarts proprioception: walk balanced on a line, jump over chalk, and touch the right ear with the left hand. The brain awakens, coordination sharpens.
During exercises, favor short instructions. “Push hard, lift your feet, aim for the red cone, brake gently.” This binary format limits mental load. The child stays in action. Sometimes we count down to trigger momentum. This count becomes a motivating ritual.
The adult’s posture changes the scenario. Rather than running while holding the saddle, one stands as an attentive observer. Frames are offered and autonomous adjustments valued. The child owns the situation. They experiment, make mistakes, then correct.
A short list recalls the essentials:
- 🎯 Lower the saddle and remove pedals for smooth sliding
- 🦺 Check helmet, brakes, and tire pressure
- 🗺️ Simple marking: two cones, a very visible finish line
- ⏳ Short sessions: 10 to 15 minutes, but regular
- 🗣️ Brief and positive instructions, without information overload
- 🎉 A victory ritual for each small step
When the weather cools, clothing weighs on comfort and attention. Concrete tips are offered here: protecting children from the cold. A warm child stays available to learn. Their energy goes to the handlebars, not the shivers.
This staging makes all the difference. Well prepared, the bike transition becomes controlled play, not a trial. The session starts with a smile and ends in pride.
Micro-steps to validate before putting pedals back on
Three micro-steps mark the path ahead. Stable sliding over 8 to 10 meters, controlled braking over a defined zone, then trajectory in a slight turn. Check each box without rushing. As soon as these milestones are reached, pedals go back on. The magic often happens very fast.
Successful preparation creates a ramp toward autonomy. It establishes a sense of competence that will fuel all following sessions.
Supporting the first bike steps: progressive exercises and games for solid bike progress
Putting the pedals back on doesn’t mean forgetting the glide. The balance bike spirit is kept: push, lift the feet, then add pedaling when momentum is established. This shift avoids jerks and favours cyclist confidence. The first rides take place over 5 to 10 meters.
A simple protocol structures the session. It starts with a “ready, set, go” for three, push twice, lift feet, then put the right foot on the high pedal. The torso straightens, the gaze flies far. Once the movement starts, the second pedal is naturally caught.
To anchor stability, play with arm width. Hands firmly on the handlebars, elbows slightly soft, shoulders low. Maintain steady breathing. A key phrase helps: “Look where you want to go.” The bike follows the eyes. It’s mechanical but mostly very effective.
Games speed up bike learning. Slalom between two cones, treasure hunt set in a straight line, then the “gate” to pass between two chalk lines. Each game changes only one parameter at a time. The child concentrates on a clear task, then savors success.
Also plan a “braking challenge.” A colored square marks the stopping zone. The child must stop there without putting a foot down. Finger pressure is corrected, center of gravity shifted slightly back. Safety is strengthened without fear.
Léa, our little cyclist, quickly found the trigger. Her steady gaze guided her arms. Her feet reached the pedals after a clear momentum. The first ride unaided lasted six seconds. It was enough to change her inner posture. Smile, pride, and desire to try again.
To vary, introduce mini-missions. “Pass the blue gate,” “Slow down at the green line,” “Make a big curve toward the tree.” These concrete instructions channel energy. They encourage fine control without jargon.
The attention span of young children is limited. Better to cut the session at the first sign of tiredness. An early stop maintains desire. This is a key principle for regular bike progress.
Positive feedback closes the practice. Name the success precisely: “You looked far and braked well at the square.” This feedback feeds motor and emotional memory. Next time, the child will start again with this victory in mind.
Overall, the glide–pedal–brake–turn sequence weaves lasting skills. The progression remains clear. It reassures as much as it motivates.
Managing fear and cultivating cyclist confidence: rituals, language, and emotional support
Fear is not the enemy. It signals the stakes’ importance. The adult welcomes it, names it, then offers a framework. A 20-second breathing ritual calms the body. Two breaths through the nose, one long exhale through the mouth. The tone of voice already does half the work.
Positive storytelling transforms the scene. Tell the story of a park hero who learned in three tries. Emphasize the tries, not the falls. The child projects. Their brain anticipates success rather than failure. Cyclist confidence rises.
Some phrases carry far. “You choose when you’re ready.” “I stay close, you take care of the bike.” “Your body already knows the glide.” These phrases give power back to the child. They avoid the trap of commands.
Rituals structure emotion. A helmet check, a knowing smile, then a countdown. Tick off the steps together on a small drawn card. The child sees their progress. They get attached to it. Play takes precedence over apprehension.
Strengthening emotional safety is not just about the bike. Balance games on the floor, indoor obstacle courses, and developmental activities build body awareness. Playful and progressive ideas are presented here: development and awakening games. By reinforcing gross motor skills, the bike terrain is also prepared.
Successes are celebrated without exaggeration. A sticker, a dated drawing, a photo sent to grandparents suffice. The main message remains: “You progress because you practice.” It’s a building block of self-esteem, not an imposed performance.
Fear of falling deserves a concrete response. Show how to shift to the side to put a foot down. Repeat this gesture while stopped, then slowly. The child feels they can catch themselves. Their alarm system lowers a notch.
When emotion overflows, take a break. Drink, laugh, tell a story. Don’t force. Restart on a micro-goal to restore momentum. Sometimes, the greatest victory is just one new meter gained.
Some children love models. A short video inspires without pressure. Choose simple images, encouraging lips, and concrete exercises.
Rituals, language, and proofs of control form a winning trio. This alliance breaks down invisible barriers. It opens the way to repeated tries, thus to learning.
Child bike safety and family culture: coding rules and stretching achievements over time
Child bike safety is not a “blacklist.” It’s a culture of gestures. It’s built in joy and coherence. Rules are explained through play, then reactivated at each outing. The child understands the “why,” not just the “no.”
A simple code sets in quickly. Stop before parking lot entrances. Look left, right, then left again. Get off the bike to cross. These signs become automatic. They don’t cut pleasure, they protect it.
Checking equipment is learned early. Do brakes bite well? Are tires inflated? Does the chain glide smoothly? The child is given a mission: point out each element. They become an actor in their safety. Their attention strengthens.
The clothing matters. Short laces, pants that don’t snag, and, depending on the season, a thermal layer. Useful tips remind how to keep children well covered without restricting movement: keep children warm. Thus, attention stays on the road, not on frozen fingers.
The open road can wait. First reserve calm parks and bike paths. When basics are strong, introduce environmental reading. Point out signs, comment on other users’ trajectories. The child learns to anticipate, not just react.
At home, bike culture anchors through small rituals. Put away together, clean the chain, stick a “maintenance done” sticker. These gestures weave a shared story. They create desire to put the helmet back on the next day.
Autonomy grows with clear limits. Specify where one can ride alone, for how long, and how to ask for help. This framework protects initiative-taking. It does not hinder freedom, it organizes it. Educational paths on autonomy can inspire daily life: autonomy and guidelines.
Finally, plan easy family outings. A lake round, an ice cream at the kiosk, then a freewheel return. Collective pleasure becomes a driver. The child links the bike to warm emotions. They will ask themselves to go again.
A final reminder links everything else. The child imitates what they see. A calm, focused adult who respects traffic rules teaches without words. This silent model weighs more than any speech.
Well-experienced safety does not stifle momentum. It gives it solid wings. The circle closes: pleasure, control, and lasting progress.
Mini consolidation program over four weeks
Week 1: glide and look far. Week 2: square braking and gentle turns. Week 3: 30-meter relay, then 50. Week 4: small family outing. Each milestone is celebrated. Each detail is maintained. Skill becomes a happy habit.
“One meter of boldness today, a world opening tomorrow.”
At what age to remove the training wheels?
When the child shows a stable glide, controlled braking, and the desire to try. This often happens between 3 and 5 years old, but the best indicator remains observing balance and motivation.
Is it necessary to go through the balance bike?
No, but turning the bike into a balance bike (by removing the pedals) makes the transition easier. The child regains balance without cognitive overload, then reintroduces pedals gently.
How to avoid fear of falling?
By showing how to place the foot laterally, repeating this gesture while stopped, and validating each small success. A well-fitted helmet and flat terrain strengthen the feeling of control.
How long does the learning take?
Often, a few short sessions are enough to ride straight. Consolidation stretches over 3 to 4 weeks, with playful and regular exercises to anchor brakes, turns, and gaze.
Should training pads be banned?
They stabilize but delay balance. Better to approach via gliding without pedals, then a gradual return to pedaling. This method develops cyclist confidence faster.