Eggshell Chalk: Crafts: making chalk with eggshells for 1-3 years old.
| Short on time? Here’s the essentials ⏱️ |
|---|
| 👶 Ideal for children 1-3 years old: a short, sensory, and safe craft activity. |
| 🥚 Eco-friendly base: the eggshell provides the calcium that hardens the chalk. |
| 🧼 Cleanliness first: remove the membrane, dry thoroughly, then grind very finely. |
| 🎨 Soft colors: food coloring or washable gouache, a few drops are enough. |
| 🛡️ Safety: constant supervision, sealing molds with tape, drying time of 12 to 24 hours. |
| 🧪 Quick alternatives: cornstarch + water for a “DIY natural chalk” version, plaster reserved for adults. |
| 🌈 Goal: stimulate sensory awakening and child creativity, without stress or expensive materials. |
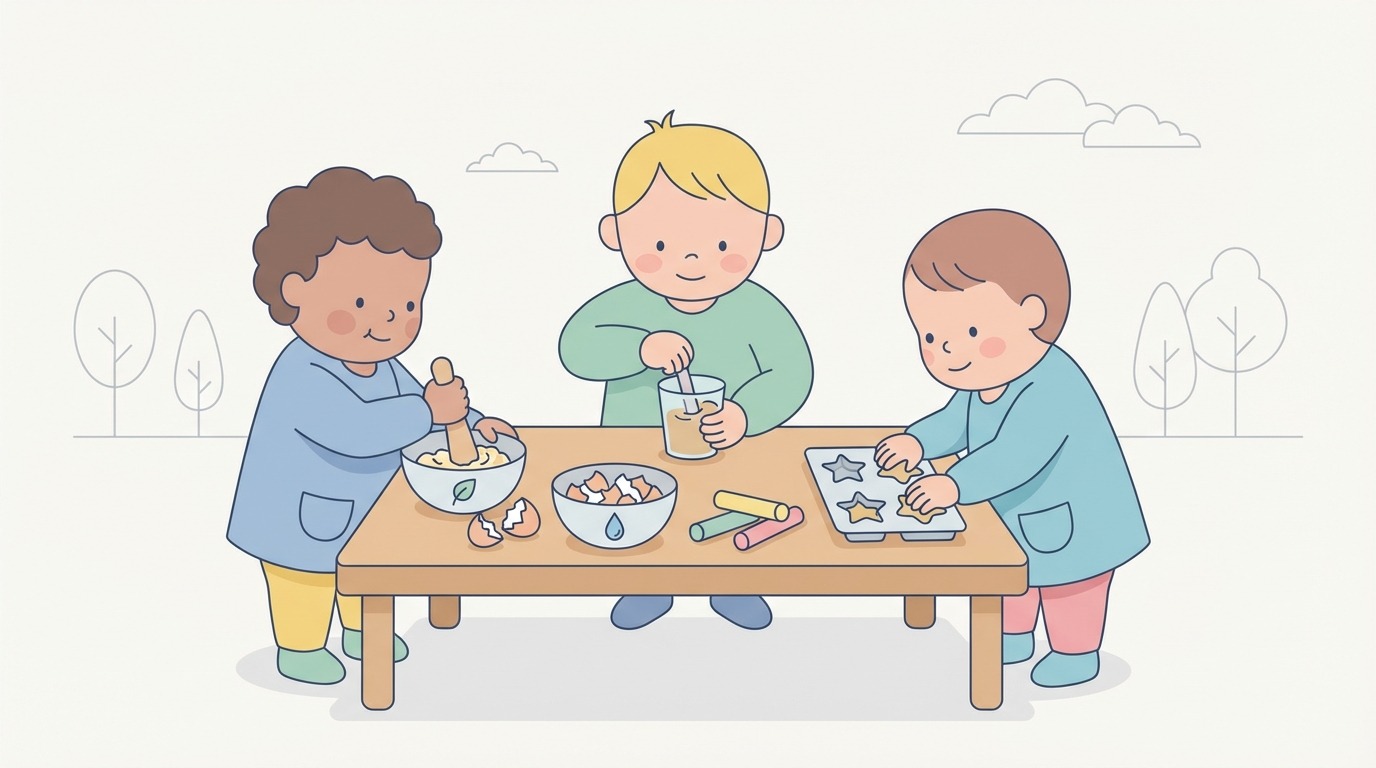
Reusing shells instead of throwing them away transforms everyday life into a playground for exploration. Making homemade chalk thus becomes an eco-responsible craft, suitable for children 1-3 years old, experienced as a game and finished with a drawing on a slate or sidewalk. Because the eggshell is rich in calcium carbonate, the material hardens naturally. The gesture is simple, the sensations are rich, and success is almost immediate.
This craft activity is not just a tutorial. It opens a dialogue about recycling, wherever cooking happens. It creates a shared moment of attention that supports fine motor skills, concentration, and autonomy. Finally, it easily fits into a children’s workshop at home or in childcare, with little material and plenty of enthusiasm. Variations exist, but the eggshell version remains the most poetic and meaningful for toddlers.
Safe eggshell chalk recipe for children 1-3 years old
To succeed in a DIY natural chalk that holds well in hand, rigor lies in the details. The quality of the powder determines the stick’s hardness and the sharpness of the line. First remove the inner membrane from the shells, then wash and dry carefully. Once dry, they are ready to be powdered.
Essential materials and preparation
A mortar and pestle, or a small herb grinder, are suitable. Simple molds, like toilet paper rolls closed with tape, do the job. Line the inside with wax paper for easy unmolding. Next, prepare the base: two measures of flour for one measure of very fine eggshell powder, then gradually add water until obtaining a thick paste, without lumps.
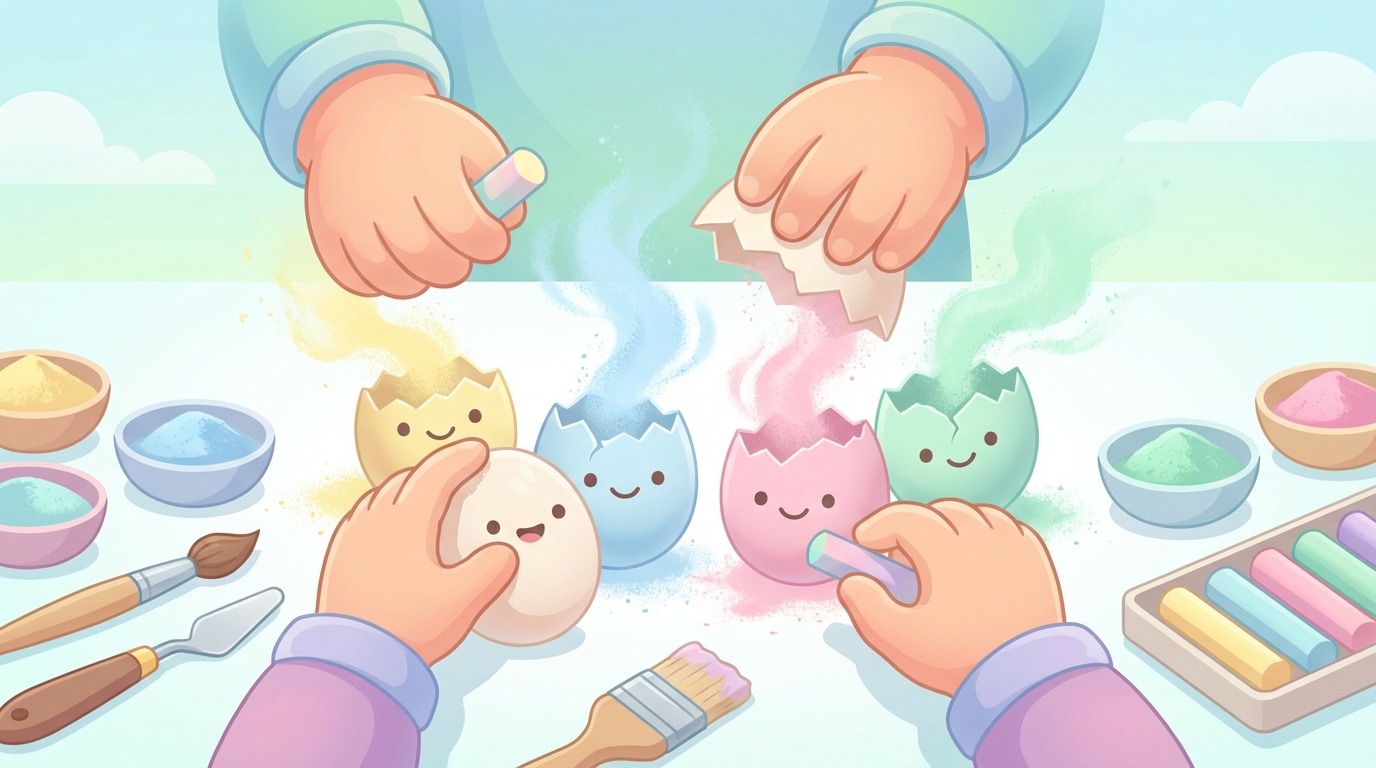
Coloring comes last. A few drops of food coloring are enough. Washable gouache also works, but in small amounts to preserve consistency. For more complementary ideas to try in the living room, explore these creative activities at home.
Targeted steps and helper tips
- 🥚 Grind the eggshell finely until a silky powder.
- 🥄 Mix 2 parts flour + 1 part powder, then add water by spoons.
- 🎨 Lightly tint, then fill the molds by packing down.
- 🧻 Seal the bottoms with tape and cover with wax paper for clean drying.
- ⏳ Let dry 12 to 24 hours depending on room humidity.
- 🧽 Cleaning tip: one drop of dishwashing liquid in the paste helps erase on slates.
The key lies in the powder’s fineness and the patience during drying. Well-dried and well-packed chalk marks better and breaks less.
Educational benefits: sensory awakening, language, and fine motor skills
The act of making chalk involves the thumb-index pinch, strengthens the wrist, and develops joint attention. The texture of the paste, the subtle smell of flour, the sound of shells being crushed—all nourish the sensory awakening. For a toddler, these micro-experiences accumulate and support language acquisition since one names, compares, and describes.
What the child really develops
In a realistic scenario, Léa, 2 years old, pours the water drop by drop and comments “it flows.” Her adult values each gesture. Then she draws a yellow line on a slate and opens the way to first “circles” or “lines,” which are preludes to graphic skills. This process prepares future learning. To broaden the horizon, these toy ideas that support development complement the artistic practice.
The benefit goes beyond drawing. Managing waiting during drying builds patience. Anticipating the final result facilitates mental planning. Finally, the child appropriates the made object, boosting self-esteem.
Going further with meaning and pleasure
A children’s workshop around colors allows exploring basic mixing. Yellow and blue make green, red and yellow make orange. New words become concrete thanks to the gestures. To strengthen the play-educational aspect, also draw from these play-educational activities compatible with quiet times.
Practical conclusion of this step: when the senses are engaged with kindness, child creativity flourishes and learning consolidates, without pressure or overstimulation.
Recipe variations: plaster, cornstarch, and natural hues
The “eggshell” version is popular for its recycling aspect. However, other options exist. Plaster of Paris yields dense and smooth chalk. Here, the adult manages the powder and measures half a cup of plaster for two spoons of washable paint. The children watch, stir with a spatula, then decorate the molds. This variation is preferred when line precision is paramount.
For an ultra-gentle approach, the cornstarch + water recipe (equal parts) appeals by its simplicity. It is perfect for toddlers who directly participate in mixing. A few drops of colorant are enough. Then pour, dry, draw. The texture is crumblier but the pleasure is immediate. Ice cube trays molds are very practical, with a short, round grip.
Regarding colors, spinach for light green, beetroot for pink, or turmeric for yellow offer natural hues. The finish is pastel, thus suitable for thick paper and light-colored sidewalks. Avoid glitter and essential oils with children under 3, as they may irritate and compromise safety.
In summary, each variation has its signature. Depending on age and context, the right recipe is the one that ensures safety and excites the child.
This visual demonstration will usefully complement setup, especially for a first family trial.
Organizing a children’s workshop at home or childcare
Setting up a small children’s workshop around chalk means planning calm and energy. Prepare the workspace, protect the table with a washable cloth, and provide aprons. Set up three clear stations: grinding, mixing, pouring. Children rotate, each with a simple role, and the adult orchestrates without rushing.
Framework, rhythm, and time management
The best moment is in the morning, when attention is high. A 20 to 30 minute session is enough for children 1-3 years old. During drying, alternate with a quiet game, a book, or a song. For complementary ideas and easy logistics, see how to organize a creative birthday with “short workshops.” The principle transposes very well to homemade chalk.
Operational checklist
- 🧂 Prepare ingredients in small bowls, pre-measured.
- 🧻 Seal molds in advance with tape to prevent leaks.
- 🧴 Have a basin of lukewarm water and hand towels.
- 🧼 Clean progressively, not just at the end, to stay on track.
- 📸 Photograph steps to value effort, not just results.
The framework makes the difference. Thinking of the workshop flow reduces surprises and focuses children on the essentials, joyfully.
Pro tips for chalk that marks well and cleans quickly
A stick that slides without crumbling depends on three choices: fine powder, homogeneous mixture, and complete drying. A 24-hour drying time is a good standard in humid winter. In summer, 12 hours may suffice but never near a direct heat source. Wax paper facilitates extraction without cracking the chalk.
Simple and effective optimizations
For sidewalk drawing, favor slightly thicker sections. In a paper towel roll cut in half, the diameter is ideal for a 2-year-old hand. For a slate, thinner molds favor precision. Adding a micro drop of dishwashing liquid in the paste improves erasing on whiteboards or plastic.
Store sticks in a metal or cardboard box, with a few grains of rice to absorb moisture. Label the colors with a dry paint dot, so the child can visually identify the choice. Older siblings can help with mixing. To adapt expectations by age, the developmental landmarks at 5 years offer useful comparison points.
Finally, if a stick breaks, reuse it as “tablet” chalk for rubbing on paper placed on textures (bark, coin). Nothing is lost, everything transforms.
With these adjustments, performance improves session after session, without multiplying materials or prep time.
“When the shell becomes chalk, curiosity paves the way and joy signs the drawing.” ✨
{“@context”:”https://schema.org”,”@type”:”FAQPage”,”mainEntity”:[{“@type”:”Question”,”name”:”Faut-il stu00e9riliser les coquilles d’u0153uf avant usage ?”,”acceptedAnswer”:{“@type”:”Answer”,”text”:”Un lavage u00e0 lu2019eau chaude savonneuse suivi du2019un su00e9chage complet suffit. Retirer la membrane intu00e9rieure est crucial pour u00e9viter les odeurs et assurer une poudre bien su00e8che, donc une craie plus solide.”}},{“@type”:”Question”,”name”:”Quelle recette est la plus su00fbre pour les 1-3 ans ?”,”acceptedAnswer”:{“@type”:”Answer”,”text”:”La version coquille du2019u0153uf + farine + eau est la plus douce, car elle u00e9vite la manipulation de plu00e2tre. Lu2019adulte pru00e9pare la poudre et lu2019enfant peut mu00e9langer et couler avec supervision.”}},{“@type”:”Question”,”name”:”Comment obtenir des couleurs vives sans tacher ?”,”acceptedAnswer”:{“@type”:”Answer”,”text”:”Utilisez de la gouache lavable en tru00e8s petite dose ou des colorants alimentaires. Testez sur une surface discru00e8te et ajoutez une goutte de liquide vaisselle u00e0 la pu00e2te pour faciliter lu2019effacement.”}},{“@type”:”Question”,”name”:”Combien de temps se conserve la craie maison ?”,”acceptedAnswer”:{“@type”:”Answer”,”text”:”Plusieurs semaines dans une bou00eete su00e8che. Ajoutez quelques grains de riz comme absorbeur du2019humiditu00e9. Si la craie devient friable, laissez-la ressu00e9cher 24 h u00e0 lu2019air libre.”}},{“@type”:”Question”,”name”:”Peut-on animer un atelier avec des enfants du2019u00e2ges diffu00e9rents ?”,”acceptedAnswer”:{“@type”:”Answer”,”text”:”Oui. Confiez le broyage aux plus grands et ru00e9servez le mu00e9lange-coulage aux plus petits. Pour des idu00e9es complu00e9mentaires de su00e9quences mixtes, explorez aussi ces activitu00e9s ludo-u00e9ducatives.”}}]}Should eggshells be sterilized before use?
A wash in warm soapy water followed by complete drying is enough. Removing the inner membrane is crucial to avoid odors and ensure a dry powder, thus stronger chalk.
Which recipe is safest for 1-3 year olds?
The eggshell + flour + water version is the gentlest, as it avoids handling plaster. The adult prepares the powder and the child can mix and pour under supervision.
How to get bright colors without staining?
Use washable gouache in very small amounts or food coloring. Test on a discreet surface and add a drop of dishwashing liquid to the paste to ease erasing.
How long does homemade chalk keep?
Several weeks in a dry box. Add a few grains of rice as moisture absorber. If the chalk becomes crumbly, let it dry out for 24 hours in open air.
Can a workshop be run with children of different ages?
Yes. Delegate grinding to the older ones and reserve mixing-pouring for the younger. For complementary ideas of mixed sessions, also explore these play-educational activities.