Video DIY Kids: Easy DIY Ideas for Children.
| Short on time? Here’s the essentials ✂️🎨 |
|---|
| Favor easy activities filmed step by step, with slow and visible gestures 👀 |
| Prepare a simple materials list and labeled bins to save time 🧺 |
| Adapt each DIY tutorial to age: 3-5 years for basics, 5-8 years for independent creating 🧠 |
| Use creative ideas related to everyday life: cardboard, paper, glue, recycling ♻️ |
| Alternate educational games and creative hobbies to foster motor skills, language, and confidence 💬 |
The video transforms children’s DIY into a bonding, structured, and inspiring moment. Thanks to calm sequences, close-up shots, and an adapted pace, each gesture becomes a clear landmark for little hands. Thus, manual activities flow more smoothly, and adults feel supported by simple narration, without overload.
At the heart of this approach, the intention remains twofold: encourage quick success and nurture curiosity. Short manual projects alternate with slightly longer challenges, respecting children’s attention span while valuing their perseverance. Even better, a good video offers a minimalist materials list, breaks, and tips to avoid overstimulation. With creative ideas connected to everyday life, it becomes easy to DIY often, stress-free and without costly purchases.
DIY videos for children: winning structure and educational scripting
Filmed steps to secure the action
To succeed in a DIY tutorial with little ones, visual clarity is key. Close-up shots, slow gestures, and a neutral background guide the eye. Then, the child knows where to look and how to follow. Ideally, show the entire step once, then replay it more slowly. This double timing reassures and establishes a measured rhythm.
Effective scripting segments the project: preparation, handling, assembly, showcasing. Each part consists of two or three simple actions. Thus, Lina, 4 years old, follows without getting lost when cutting three strips, gluing them into a loop, then making a garland. This sequencing avoids the tunnel effect and multiplies small victories.
Materials list: clarity, safety, and frugality
A short list, readable at a glance, changes everything. Before starting the video, prepare glue sticks, round-tip scissors, colored paper, paper tape, and a damp cloth. Then, indicate alternatives: cereal box cardboard, paper rolls, fabric scraps. This choice reduces cost, stimulates creativity, and avoids disappointment.
To save time, store in labeled bins by function: “cut”, “glue”, “decorate.” Moreover, a small non-slip mat stabilizes the work area. ⚠️ Putting sharp tools out of reach before and after the workshop remains non-negotiable. Simple materials reinforce autonomy and safety.
Rhythm, voice, and micro-goals
The narrator’s voice must remain warm and precise. Short action verbs ease comprehension: “cut,” “place,” “press,” “turn.” Then, announcing a micro-goal motivates the child: “In one minute, your rocket will have its window.” This framework encourages progress without pressure.
In practice, well-paced tutorials alternate calm and enthusiasm. A gentle background music suffices, without masking the voice. Finally, showing the final result at the beginning helps projection. The child knows where they’re going and enjoys getting there. The video becomes a concrete guiding thread.
Ultimately, a good video simplifies, reassures, and empowers to act here and now.

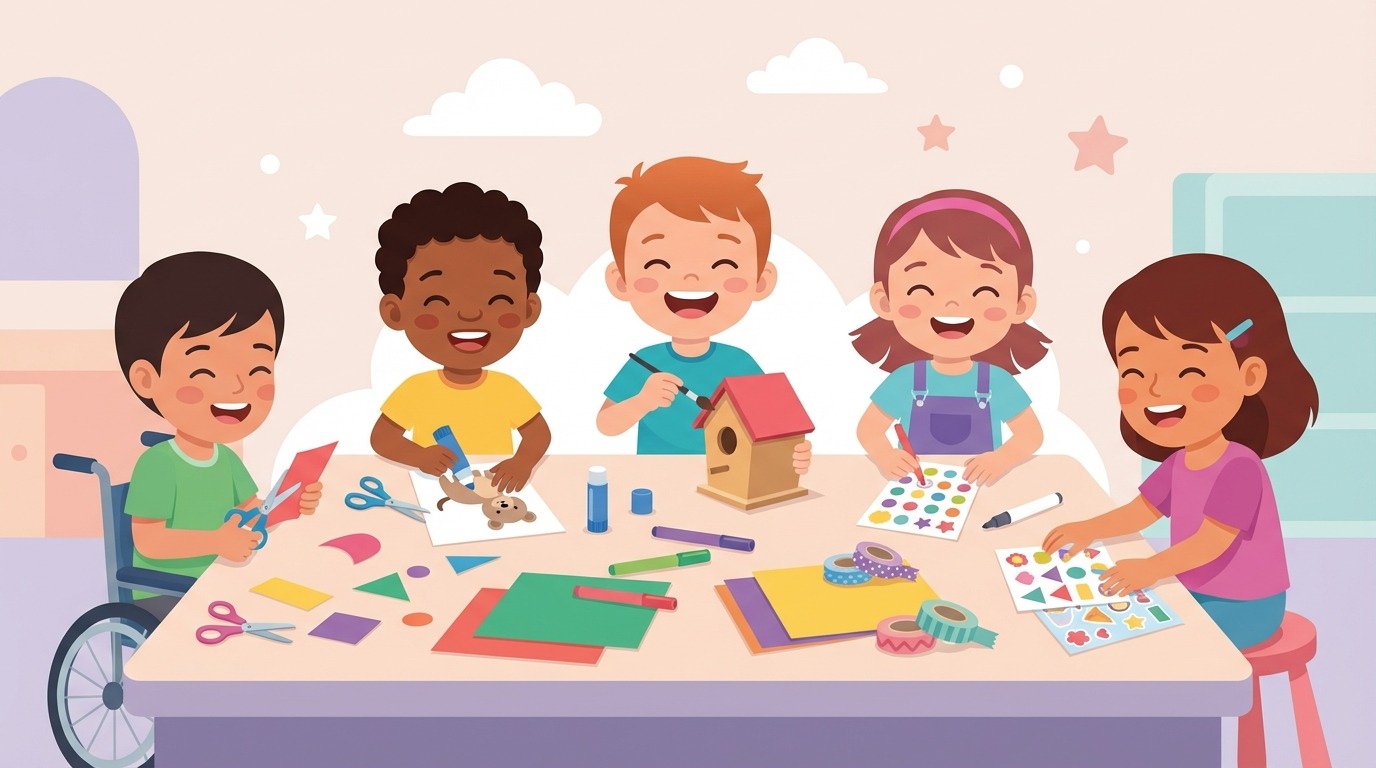
Manual activities 3-5 years: cutting, gluing, shaping without stress
First gestures: cutting and tearing to understand the material
Between 3 and 5 years, the important thing is not the beautiful, but the doing. Kids’ DIY become more effective when they tackle fundamental gestures. First, cutting wide strips from stiff paper. Then, tearing rough shapes to feel resistance. This passage through the material lays the groundwork for fine motor skills.
According to early childhood specialists, handling, pressing, pulling, and squeezing activate key brain networks. Consequently, these educational games nurture spatial understanding and gesture control. These are well-invested hours, far from screens.
Gluing, assembling, layering: the space comes alive
Next comes assembly: wooden sticks, cotton, felt scraps. Gluing large pieces first, then smaller ones, clarifies the notion of plane. One can create a tactile garden: green paper on the floor, felt circles for flowers, cotton for clouds. Each element tells an intention, and the child sees it come alive.
Modeling completes this learning. Self-hardening clay, clay, or salt dough: fingers knead, roll, pinch. This three-dimensional material invites thinking about volumes. Recent studies remind that these actions consolidating fine coordination later support handwriting. Pleasure prepares skill.
Painting differently: fingers, sponges, and everyday objects
Painting with a brush remains classic. However, offering sponges, bottle caps, or small branches transforms the experience. Then, explore prints, rhythm, repetition. A short session suffices, especially if the child can name their colors and gestures. Language weaves naturally with action.
💡 Tip: post three photos of key steps on the wall. The child checks and progresses independently. Then, showcase the result with an exhibition corner at their height. The artwork becomes a daily landmark.
To diversify supports, some tutorials offer templates. Printable ready-to-use templates simplify setup and secure the cutting step. Success arrives faster, and pride too.
- 🟢 Make a paper leaf crown: trace, cut roughly, glue the tips.
- 🟣 Create a jellyfish from ribbons: a disc, tentacles from torn strips, sticker eyes.
- 🟠 Compose a tactile landscape: cotton, felt, painted caps for flowers.
- 🔵 Roll transformed into a rocket: cone at the top, glued window, stamped stars.
The essentials in few words: a clear gesture, a short instruction, a result achievable now.
Creative ideas 5-8 years: manual projects on video to gain autonomy
Build, measure, adjust: cardboard becomes architecture
With 5-8 year olds, curiosity calls for design. A memorable manual project consists of building a small cardboard house. Plan the facades, measure, tape, then decorate. This progression introduces anticipation and revision. In case of mistake, adjust and learn.
To go straight to the point, a clear guide helps a lot. Building a step-by-step cardboard house offers a precise framework, while leaving room for fancy windows or colorful roofs. The video reinforces technical gestures and secures delicate stages.
Knots, weaving, and patterns: the hand reasons
At this age, creative hobbies become pretexts to organize thought. Braiding, making a figure-eight knot, lacing, sewing running stitches on perforated cardboard: each action translates a logical sequence. What if we added a braided bracelet to apply these gestures? A guide to learning knots and loops supports reasoning, while developing daily autonomy.
Weaving on a cardboard frame opens a graphic universe. Choose a color scheme, alternate passes, create relief. The child anticipates the effect of their decision and sharpens their gaze. These skills later matter for writing, mathematics, and time management.
Handmade games and playful challenges: cooperate and aim right
Making a game stimulates the desire to share. A homemade bowling game made with recycled bottles illustrates this spirit well. Weigh the sand, paint the pins, mark the throwing zone. Then, each plays and evaluates their progress. The project ends with a collective celebration.
Creative ideas can also connect to seasonal challenges. A Santa’s sack to make turns a festive period into a manual adventure. The video details sewing, assembling, and decor variations. The child experiences a complete journey, from plan to useful object.
For even more adapted inspiration, consult ideas for 5-8 years to broaden the repertoire without overlooking skills. In the end, DIY takes the form of gentle but structuring training.
The golden rule remains clear: a clear challenge, a visible method, and freedom to adjust along the way.
Organizing a creative hobbies workshop: space, time, rituals, and music
Set up a framework that encourages action
A carefully thought-out environment multiplies success. A clear table, a washable cloth, bins by function, and tools prepared from the start set a reassuring base. Then, a benevolent timer structures time: 5 minutes to prepare, 15 to create, 5 to showcase. These markers avoid dispersion.
Visual signage matters too. Three icons suffice: “look”, “do”, “tidy”. Then, a protected drying area normalizes waiting. This organization mentally lightens children and adults. Everything flows smoothly.
Lead the group without stifling initiative
With several children, the secret lies in role distribution. One becomes tape master, another watches the timer, a third photographs the result. Thus, everyone finds their place and contributes. Moreover, naming successes along the way strengthens effort more than outcome. The energy stays positive.
A soft soundtrack anchors attention. Soothing nursery rhymes and children’s songs support rhythm without saturating listening. When the video pauses, music keeps breathing. The group stays focused, without tension.
Active safety and guided autonomy
Safety rules gain by being embodied through visible gestures. Show how to pass scissors by the rings, how to carry closed glue, and where to place hands for pressing. Then, the adult circulates, observes, and helps only if necessary. The child learns self-correction by watching the next step on screen.
- 🧤 Thin gloves for painting if needed, but hands free for cutting.
- 🧽 Damp sponge within reach: quick cleaning, frustration avoided.
- 🧺 Dedicated “waste” bin: throw away continuously, space stays neat.
- 🧯 Non-toxic glue and stable surfaces: serenity assured.
A well-organized workshop acts as a springboard: it sets in motion and celebrates progression step by step.
Evaluate, celebrate, and share: from kids’ DIY to lasting confidence
Track progress: visual portfolio and simple criteria
To anchor learning, keeping traces changes the game. A binder or digital folder gathers three elements: photo of the object, short sentence describing the key gesture, and an idea to improve next time. Then, browse regularly. The child measures their path, concretely.
Clear criteria guide positive evaluation: follow three steps, try a new tool, or finish within the planned time. This encouraging look installs the desire to start again. Confidence thickens session after session.
Telling with video: voice over and key steps
Filming a step briefly per project suffices. Comment with short action verbs. Then, add a smiling voice-over: “You pressed hard to glue, well done.” The video becomes a motivating mirror. It does not expose the child; it highlights their approach.
When a support is missing, targeted resources complement the experience. Useful printables to download help prepare sessions and vary templates. This boost reduces improvisation and strengthens adults’ comfort.
Celebrations, seasons, and transmission
Yearly highlights give meaning to creations. A DIY market at home, an exhibition in the hallway, or a “best of” video stimulate speech and argumentation. Moreover, a gift to offer consolidates empathy. The child thinks of others, chooses colors for someone, and tells their choice.
Easy activities then become family rituals. We listen, adjust, start again. And, above all, we laugh a lot. This atmosphere of encouragement continues well after tidying up, in ways of problem solving and collaborating.
In the end, children’s crafts nourish the hand, eye, and heart. They weave solid memories strengthening curiosity for a long time.
To avoid digital dispersion, it’s better to favor a few reliable channels and a dedicated weekly slot. Thus, video remains a tool serving the gesture, not the opposite. The pleasure of learning is maintained when the hand leads the dance.
What is the best first project for a 3-year-old child?
A simple textured collage: colored paper as background, cotton for clouds, painted caps for flowers. Three clear gestures (tear, glue, stamp) and a visible result in less than 15 minutes.
How to avoid frustration during DIY?
Announce micro-goals, offer material alternatives, and provide a drying area. A benevolent timer and steps filmed slowly also secure progression.
What essential tools should be kept within reach?
Round-tip scissors, glue stick, paper tape, assorted papers, sponges, wooden sticks, damp cloth. All stored in labeled bins to facilitate autonomy.
How to adapt a 5-8 years tutorial to heterogeneous levels?
Offer tiered versions: pre-cut shapes for beginners, precise measurements and finer assemblies for advanced. The goal remains common, difficulty varies.
Which videos to choose for classroom or home?
Favor calm videos, with close-up shots, little on-screen text, a simple materials list, and clearly numbered steps. Projects should last 15 to 30 minutes maximum.
“When little hands create with heart, big ideas take root.” 🌱